Category

Blog Post

How To Create Winter Container Gardens

By | Blog Post | No Comments

As beautiful as the winter landscape is, sometimes Mother Nature can use a helping hand. When I look out my windows as the days get shorter, I need to see something that lifts my spirits.

The best way I’ve found to add a touch of color and some good cheer to my empty garden is a few well-placed containers brimming with hardy plants, fresh evergreen boughs, pine cones and other natural materials. If there’s an electrical outlet nearby, a length of twinkly lights chases the gloom away.

It’s easy to change out pots filled with fall foliage to create a winter container garden. First, choose the pots that can stand up to cold temperatures, like fiberglass, iron, wood or heavy plastic. Store away the terra cotta clay containers because they can crack or flake from cold winter weather.

The next step is gathering the plants and other materials to design the winter container. Select one or more hardy plants that are rated for Zones 3 or 4—the colder the better. Small evergreen trees or a hardy holly plant will give some upright structure and seasonal color to the container.

To help your live plants make it through the winter, water prior to planting and place the container where it’s protected from drying winds and drying soil. It’s also a good idea to keep watering the plants, at least monthly, until soil freezes.

Ornamental grasses, meant for a single season, can be at the center of the container, too. Another idea is to substitute tall branches that add height as the container’s focal point.

The best-looking winter containers are those that mix living and dried materials, all tightly packed together. Fresh-cut boughs of spruce, fir, cedar and juniper give containers color and layers of texture. A few gold-tipped evergreen branches add an unexpected spark of color to the greenery.

When arranging the boughs, think in layers and place a few almost upright and let others drape over the edge of the container. Use smaller seasonal plants, like winterberry, to fill in along the container’s front border. Beautiful fruits and berries will typically hold their color through the season, especially stems with rose hips at their tips.

Several redtwig dogwood branches, curly willow spikes or other unusual branches add the finishing touch to the container’s overall design. Sprinkle them randomly through the greenery by poking one end into the soil deep enough so they’ll stay upright.

If the soil is too dense, pour a bucket of warm water into the container to make it more pliable.

Place other natural elements, like assorted sizes of pinecones, seed heads, and dried grass plumes, throughout the container, too. If needed, use wire to attach these trimmings to branches or tie wired florist’s picks to decorations and place them where you need them as filler.

If you don’t have access to natural decorative embellishments, or simply want a more seasonal container, you can add stems of artificial holly berries, silk poinsettia flowers, sprays of life-like boxwood picks, and suspend some fake mistletoe at the top.

Every container is sure to be a welcome sight during the quietest season in the garden.

Indoor Gardening With Houseplants

By | Blog Post | No Comments

Houseplants can be common or uncommon, and it has nothing to do with the kind of plant you choose for your space. Instead of selecting a houseplant and plunking it in a sunny spot, it’s time to rethink ways to use houseplants as part of the interior design.

Houseplants add so much to the indoors we need to treat them like the green treasures they are. They clean the inside air to help us breathe easier, they add a sense of calm, and plants help boost our happiness quotient. Houseplants can also add style to any room in the house.

Now’s the time to start shopping for houseplants at Nick’s to light up the indoors during winter. When browsing the houseplant aisles, pay attention to the different types of plants to imagine what will work best in your space. There are climbing and trailing plants, bushy and upright plants, flowering potted plants, ferns and palms, cacti and succulents, miniature trees, air plants, and pint-sized plants for dish gardens and terrariums.

No matter which kind of houseplants you choose, think about the ways you can turn the display into an indoor garden. One key to success for becoming your own plant interior decorator is by following the landscape design concepts of balance, focal point and color.

BALANCE
Balance means the plants are in proportion to the space and to the other houseplants. Choose plants that are similar in size, form and texture. For example, place all cactus plants together instead of mixing spiny plants with those that have smooth leaves.

Another example of balance is repeating themes of plants. Air plants are perfect for creating a set of similar, yet different-looking plants. A series of dish gardens or terrariums in different sized containers adds interest, as does a lining up plants in identical containers on a windowsill.

Balance can also mean similar shaped plants in pots of different sizes placed on a bookshelf or coffee table, as if they’re collectibles. An especially attractive display is hanging four identical houseplants on a wall in place of a single painting or framed photos.

FOCAL POINT
In the landscape, a focal point is either a plant or a structure that draws you into the garden. This idea can also apply to houseplants that lend an architectural feel to your space.

A houseplant with tall tree-like foliage or a large hanging plant can be a spectacular specimen plant that adds drama to a room.

A focal point houseplant is the kind that can fill an empty space or corner to make a room feel smaller and cozier. Matching topiaries by an entry way focuses attention as soon as guests walk in the front door.

COLOR
Flowering plants are typically responsible for color in the garden, and they can be placed in the indoor garden as well. Indoor blooming plants, like orchids, provide splashes of color when placed among other houseplants.

When adding flowering plants to the indoor garden, choose several of the same variety and place them together in groups. Repeating themes of plants is what makes outside gardens attractive to the eye, and that works for the indoor garden, too.

For a special decorator-like touch, look for plants with colorful foliage that complement the tones in your home. For example, take a cue from colorful throw pillows to match plants with burgundy, purple or gold-tinged foliage.

Another way to ensure color with houseplants is to mix and match the different leaf colors. Select a few plants with dark green leaves, some with light green leaves, and toss in a few with variegated leaves to bring your indoor garden to life.

Succulents Make Lovely Living Ornaments

By | Blog Post | No Comments

Small-size succulents make for some of the most interesting gardening displays these days. Succulents are adaptable to a variety of conditions, and with their thick fleshy leaves and stems they’re known for being drought-tolerant. Succulents are also popular because there are so many different kinds to choose from.

As nice as succulents are in the garden, they look equally at home indoors. Some of my favorite uses for succulents include displaying small-sized planters of mini-succulents, filling a terrarium with a selection of sculptural-looking succulents, and using them to fill a picture frame.

With the holidays approaching, succulents make for striking hostess gifts or an out-of-the-ordinary decorating choice by creating a living wreath.

A wreath made with succulents, like hens and chicks, is especially attractive and an enjoyable DIY project. To get started you’ll need a base, sphagnum moss, potting soil, plants, and some fine-gauge wire (or long pins) to hold the plants in place. You can buy a pre-made base at a craft shop or make your own from chicken wire molded over a donut-shaped plywood base and stapled into place.

Line the form or base with sphagnum moss and fill with potting mix. Start planting by arranging the largest of the plants first, then fill in with smaller succulents.

Press each plant into the soil and then cover the soil with pieces of the moss. Use the fine-gauge wire to wrap around the wreath to hold just the moss in place. Water while the wreath is lying flat. Let the water drain into a sink or tray and keep the wreath flat for a few weeks to allow the plants to root. Then hang it up. To water, take the wreath down and soak it for 10-15 minutes.

Another way to display succulents is by planting them in a miniature-garden to use as a centerpiece that lasts longer than a fresh flower arrangement.

To plant a succulent centerpiece, select a low container of any shape. Just make sure there are holes in the bottom to allow water to drain and have a saucer or tray to catch the excess water.

Succulents are plants that like soil on the dry side, so use a well-draining potting mix to fill the container. A good-quality container potting mix meant for cactus plants will work well for succulents, too.

Select succulents in sizes that are in proportion to the container and the other plants. Look for a variety of shapes and colors that work well together. One larger succulent can be the specimen plant, just like in the landscape.

Place the plants on top of the soil to find a pleasing arrangement before planting. Look at the arrangement from all angles to make sure it’s balanced without any obvious empty spaces. For each plant, dig a small planting hole, remove the plant from its container and place it as deep as it was in its container.

After all the plants are in place, water gently to give the miniature garden a good start. Add any extra decorative touches, such as small stones and miniature garden ornaments similar to those used in fairy gardens.

The best advice for caring for your succulents is to avoid overwatering. Be sure to let the soil in the container dry to several inches before watering. Another care tip is to keep your succulent garden out of direct sunlight to prevent burning the leaves.

Stock Up On Winter Squashes

By | Blog Post | No Comments

October is the best time of year to shop for great gobs of gourds. Buy plenty so you can have them on hand to enjoy during the cold winter months.

Pumpkins are the most popular of the winter squashes, but most folks use those just for decorating or carving. While you’re shopping, be sure to pick up a few sugar or pie pumpkins to use for cooking, stuffing and baking.

There’s a wonderful world of winter squashes available and now’s the time to stock up for the season. There are at least a dozen kinds of squashes at Nick’s Farm Market to use for decorating and for delicious eating.

Many gardeners grow winter squashes in their vegetable gardens, but most varieties take about twice as long to grow as summer squashes. They also take up more space in the garden, so there’s a limit to the numbers of winter squashes gardeners grow.

Mature winter squashes are perfect for storing for the long term because they’ve been cured to have a tough outer skin. When you shop for a winter squash, look for one that’s colorful, heavy for its size and with a hard rind. Avoid squashes without a stem or those that have blemishes or soft spots because they won’t keep as long when stored in a cool, dry space.

Winter squashes are naturally low in calories, high in fiber and are loaded with vitamins and minerals. Their deep rich yellow and orange colored flesh means they have plenty of beta-carotene, too. Even the seeds are good for roasting and snacking.

Here are eight of the most popular winter squashes and a few ideas for preparing them. Buy at least two or three varieties you’ve never tried before. You might find one you’d like to grow in your vegetable garden next year:

Acorn is one of the most familiar squashes because of its shape and dark green outer skin. Look for one that has a deep yellow grow spot that shows where it was in contact with the soil. Acorn squashes are good for cutting in half, stuffing and baking.

Delicata is the colorful yellow and green squash with an oblong shape. Delicata has a thinner skin than some winter squashes making it easier to slice and roast with olive oil and dried herbs.
Red Kuri has a unusual onion-like shape. These red squashes are a smaller-size, but are dense on the inside. Most chefs prefer to roast these squashes until very tender, remove the flesh and puree for a tasty and beautiful soup. For added flair, scoop the seeds from a small pumpkin to use as an attractive soup tureen.

Blue Hubbard is the large and lumpy blue-gray squash that might scare away some people. The size can be intimidating, but that just means there’s more to love. To prepare, cut in half, place it flesh side down in 1/2 inch of water and bake for 45 minutes to 1 hour at 375 degrees. Scoop out the flesh to use as a side dish, a base for soups and purees, or use it to make “pumpkin” pie.
Spaghetti squashes have a buttery smooth exterior and stringy flesh inside. To use, cut a spaghetti squash in half lengthwise, scoop out the seeds and bake cut side down in a 450-degree oven for 30-40 minutes. Let cool and use a spoon to scrape strands of squash from inside; top with spaghetti sauce.

Sweet Dumpling is as delicious as it sounds. These small-size squashes are a good size for cutting in half and baking. They make cute side dishes when served individually with butter and brown sugar.

Carnival squashes are small speckled squashes that are a cross between Acorn and Sweet Dumpling. They have a slight acorn shape and can be orange, yellow and green with speckles. The flesh is yellow with a mild taste that pairs well with maple syrup.

Butternut squashes are tan with a long neck and bulb-like bottom. For easier cutting through the tough skin, poke a few vent holes in the squash and microwave until slightly soft. Then cut the bottom portion from the neck and slice into rings; then peel. Use butternut squash to make soups, casseroles, muffins and breads.

To prepare the scooped out squash seeds, wash and remove any stringy flesh. Place on a cookie sheet in a single layer, sprinkle with kosher salt or other seasonings and roast in a 400-degree oven for 15-20 minutes or until toasted and lightly browned.

Take The Fall Lawn Care Quiz

By | Blog Post | No Comments

The season may have changed from summer to fall, but that’s no excuse to stop taking care of your lawn for the year. There’s still some care bluegrass lawns need before they go dormant for the winter.

Take this True or False quiz to test your fall lawn care knowledge. Then check your answers to see what your lawn needs before the snow starts to fly.

Lawns require less water in fall, so there’s no need to keep watering. True or False?
Fall is the time to treat the lawn for broadleaf weeds, like dandelions. True or False?
The last lawn fertilizing of the season is the most important one of the year. True or False?
Fall is the worst time of the year to reseed or renovate a bluegrass lawn. True or False?
The best fertilizer for a fall lawn feeding is one that’s high in nitrogen. True or False?
Fertilizer can be applied anytime in fall, even after the lawn has turned brown. True or False?
Core aerating a lawn is best when done only in spring. True or False?
Fall fertilizing gives turfgrass roots the energy they need to survive the winter. True or False?
Once the ground freezes, there’s no need to water in the winter. True or False?
Fall fertilizing helps lawns green up sooner in spring. True or False?
CHECK YOUR ANSWERS
How well do you handle fall lawn care? Use the answers to create a fall lawn care plan you can tackle this month.

False. While lawns do require less water in fall, a healthy lawn still needs watering about once a week especially if there’s a lack of measurable precipitation.
True. Fall is the time to treat the lawn for broadleaf weeds, like dandelions. If you had problems with broadleaf weeds, now’s the time to control them. Dandelion, bindweed, clover, thistle and plantain can be treated with herbicide while grass is still green.
True. The last lawn fertilizing of the season is the most important one of the year. Fertilizing now helps grass grow roots and side shoots that will make for a healthier lawn next season.
False. Fall is a good time to seed, reseed or renovate a bluegrass lawn. Sod can also be planted as long as the ground isn’t frozen. Be sure to keep up with winter watering so the new lawn doesn’t dry out.
True. The best fertilizer for a fall lawn feeding is one that’s high in nitrogen. Roots need nitrogen to help them grow so look for a lawn fertilizer with the highest first number, such as a 22 or 25.
False. Time your fertilizer application while the lawn is still green and at least several weeks before freezing weather begins. Water before and after fertilizing.
False. Core aerating the lawn in fall is a good first step before reseeding and fertilizing.
True. Fall fertilizing gives turfgrass roots the energy they need to survive the winter. Stronger, healthier roots will help turfgrass weather the winter and start growing again next spring.
False. Winter weather in our region often has a freeze and thaw cycle. Keep up with watering in winter – by hose and sprinkler – about once a month when there’s no snow cover and temperatures are above 40 degrees. Water early in the day to prevent water from freezing on the turf.
True. Fall fertilizing helps lawns green up sooner in spring. Healthy roots will start growing again in early spring so you can have the first green lawn in your neighborhood.

Plant Now For Great Garlic

By | Blog Post | No Comments

If you like garlic, now’s the time to plant some in your garden. You’ll thank yourself next summer when you dig up beautiful heads of flavorful garlic.

Garlic is actually an herb that’s a member of the lily family. It may have originated in Central Asia, but it’s so adaptable it can grow just about anywhere.

There are just a few gardening ideas to keep in mind when planting garlic. First, choose the freshest seed garlic you can find at the garden center. Look for large firm and unblemished bulbs without any obvious problems. One pound of seed garlic will yield between 8-10 pounds of harvested garlic.

Second, choose varieties based on how you plan to use your homegrown garlic. Choose from hardneck or softneck varieties.

Hardneck garlic varieties are popular for their flavor, are easier to peel and can be stored for up to 6 months. Hardneck varieties produce a flower stalk called a scape, which can also be used in cooking.

Softneck varieties are the same kind of garlic found in grocery stores. Softneck varieties are usually more productive than hardneck garlic and can be stored for up to a year. Because they’re good for storing, softneck garlic types are often used for braiding. Another difference is softneck varieties don’t produce a flower stalk.

Locate your garlic bed in a sunny spot in the garden that has fluffy, fertile, and well-drained soil. The night before you plant your garlic, separate the cloves from each bulb and soak in Liquid Kelp to give the cloves a good start. Don’t let cloves dry out.

Plant only the largest cloves for the biggest heads of garlic. Place the pointy end up, 1-2 inches below the surface of the soil and about 3-4 inches apart. Cover with about 2 inches of soil, water in deeply and add a thick layer of organic mulch. Straw, chopped leaves or dry, untreated grass clippings will help retain soil moisture.

Keep an eye on your garlic bed over winter and water if the soil is dry and daytime temperatures warm above 40 degrees.

In spring, once the danger of frost has passed, remove the thick mulch from the garlic bed and water deeply. Be sure to keep up with watering so soil stays moist and the garlic doesn’t have a chance to dry out.

Feed the garlic crop with either a composted manure or a well-balanced fertilizer as bulbs begin to grow. Be sure to keep the garlic bed weeded to avoid competition for space and nutrients.

If you planted hardneck garlic, watch for the tall flower stalks called scapes to emerge and cut them while they’re still young and tender (be sure to use the tender scapes in cooking). A good garlic gardening tip is to leave one scape standing. When the curly part starts to unfurl, your garlic is ready to harvest.

Another way to tell if garlic is ready to harvest is to watch for the green leaves to turn yellow. Stop watering and wait for the bottom leaves to turn brown. Use a garden fork to carefully lift the entire plant from the soil. Be careful and don’t damage the soft bulbs during harvest.

Place the fresh garlic in the shade to dry or cure for long-term storage. Once cured, store garlic bulbs in a mesh bag to allow for air circulation.

Then use your fresh garlic to flavor all your favorite savory dishes. And get ready to plant another crop next fall.

Recipe For Perfect Fall Containers

By | Blog Post | No Comments

September signals the changing of the seasons, and one of the best ways to transition into fall is by changing out summer container plantings. It’s time to replace those tired pink petunias with more seasonal offerings.

It’s easy to create a perfect fall container if you follow this simple recipe: Take one part fall flowers in complementary colors, mix in plants with attractive textures and plant tightly in an autumn-like container. Finish your fall container by garnishing with some of the bounty of available fruits and vegetables.

Now, let’s get cooking:

First, choose a color palette for your fall container. Decide whether you’d like a warm look with reds, oranges and yellows or a cool container with purples, blues and whites.

Second, decide on a container. Whether an urn, squatty square container or pumpkin-shaped pot, the most attractive plantings are those that match the look of the container. Choose a container that will fit its surroundings from September through November.

Third, grab a shopping cart and wander around Nick’s. Look for the flower colors of your warm or cool plant palette. Select several varieties of flowering plants in lighter and darker shades of the same color. Look for plants with foliage in lighter and darker variations, too.

A good formula is to select 1 upright plant, 3-5 mounding or filler plants, and 1-3 trailing plants. I like to group the plants together in the cart to see how well they fit together and then keeping wandering!

Here are some favorite fall plants to help you get started:

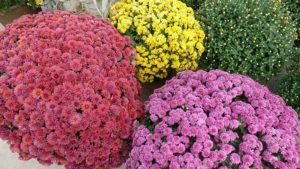
Mums are the classic go-to for fall because they come in many different colors, and they look great in containers.

Black-eyed Susans are a flowering perennial plant, but these look beautiful in fall containers.

Pansies in jewel tones are always a nice addition around the sides of fall containers. Look for pansies in rich colors like ruby, dark purple, and deep orange.

Ornamental kale is a fall filler plant because of its striking foliage, and kale can tolerant some cooler temperatures, too.

Ornamental peppers are a colorful filler plant. The peppers persist on the plants, and they look good even when they dry.

Rosemary is an herb that makes for an interesting upright plant, as does millet, sedge and different types of ornamental grasses.

Fresh miniature pumpkins, warty gourds, small squashes and other vegetables can also easily take the place of a mounding plant or two. Tuck several into the front and sides of the container.

Foliage plants like heuchera, coleus and sedum add texture to fall containers. Mix and match for the most eye-pleasing display.

Once your fall container is planted, add natural adornments like curly twigs, gnarly branches, vines with dried berries, and colorful leaves for the perfect finishing touch.

When To Harvest Your Vegetables

By | Blog Post | No Comments

It was late summer a few years ago when one of my gardening friends asked what sounded like a silly question. “How do you know when it’s time to pick green tomatoes?”

She was talking about the tomato varieties that are naturally green, like Green Grape, Aunt Ruby’s German Green, and Green Zebra.

It’s easier to time the green-tomato harvest if you know what to look for. Green tomatoes are ripe when they turn from bright green to a deeper color of green with hints of yellow or amber.

It’s important to know when to harvest fruits and vegetables for several reasons. If left on the plant too long, fruits and vegetables will become over-ripe and lose their fresh flavor. Another reason is when fruits are left on the plant too long, the plant starts setting seed and stops producing new fruits.

For example, one of the common mistakes gardeners make is waiting for homegrown eggplants to reach the size of the ones we buy at the grocery store. But the best time to clip eggplants from the plant is when the fruits are young and the outer skin is still shiny. Waiting too long means the fruit gets seedy, tough and bitter.

Here’s how to tell when it’s time to harvest some of the most popular fruits and vegetables from your garden:

Cucumbers are ready to harvest when they’re firm, green and the right size for the variety. The tastiest cucumbers are picked while small and tender, and before seeds start to mature. Clip fruits from the vine and leave a bit of stem to protect the end.

Leafy vegetables, like kale or chard, are best enjoyed when the leaves are young. Snip the greens from the outside leaves to the inside. Keep the growing tip intact so the plant will continue to send out new leaves.

Peppers can be clipped from their plants as soon as they’ve reached their full size for the variety. All peppers will turn color if left on the plant long enough, but that takes time. If you want a continuous harvest, keep harvesting the peppers, and plants will keep producing.

Tomatoes are ready to pick when they have their deep, mature color (whether red, yellow, orange, black or green) and the right size for the variety. Tomatoes should be slightly soft with shiny, smooth skin and a nice tomato aroma. Use clippers to snip tomatoes from the plant to protect the vines.

Winter squashes need to stay on their vines until the rind is dull and hard enough to resist a fingernail pushed into it. Use pruners to cut the squash from its vine and make sure to leave a handle. Winter squashes need to be cured in a warm place for a week or more to allow for longer storage in a cooler spot.

Zucchini and summer squashes need to be harvested while fruits are still small, about 4-7 inches long. Smaller is better for round squashes and patty pan squashes, too. Keep an eye on your squash plants because fruits can be ready to pick 7-10 days after flowering.

What To Plant In September

By | Blog Post | No Comments

If you’re wondering what to plant in September, the better question is what can’t you plant this month?

September is an ideal time for planting trees, shrubs, perennials, vegetables, herbs, and even some annuals. There are a few plants that will grow better when planted in spring, such as fall-blooming and heat-loving plants. You may want to avoid planting evergreen trees, too, because their needles can lose too much moisture during the winter causing problems when trees start regrowing in spring.

Here are some planting ideas to make the most of your September garden:

Buy spring-blooming bulbs now for planting through fall. For a long-lasting display next spring, buy bulbs with a range of bloom times. Crocuses and snowdrops usually appear first, followed by early varieties of daffodils and tulips, and then hyacinths. If you want to feel especially springy next year, plant mid-season and late-season bulbs, too.

Plant perennials while the weather is cooler. Black-eyed Susans and coneflowers are just two of the many perennials that can add a bit of color to gardens now and then return next season.

Add something new to the garden, like hops, a vining perennial. Plant along a sturdy trellis and water by hand to help the plant get established. Vines can grow quite long over time, and start flowering in the second or third year.

Improve the landscape for fall with colorful mums, violas and pansies. Look for hardy pansies in a range of colors to carry you through fall and then wait for them to reappear next spring.

Buy fall vegetable transplants to fill droopy annual containers or to fill in empty spots in the garden. There are plenty of good options for the fall harvest including beets, spinach, lettuce, mesclun mixes, mustard greens, chard, arugula, and much more.

Sprinkle grass seed to fill in bare spots in the lawn. September is a good time to either start a new lawn or add grass seed to help thicken areas in a tired lawn.

Look for a new shade tree to add to the landscape. Be sure to read the tree’s specifications to make sure there’s enough space for the tree when it reaches maturity.

Add a shrub or two to enhance the front or backyards. Take your time to find shrubs that offer more than one attractive feature. For example, look for shrubs that bloom in spring, offer fruit for wildlife and provide a blast of color in fall.

Revive container plantings by removing tired annuals and replacing them with new plants for a more seasonal look with mums, ornamental kale, and orange and black pansies.

Plant onions for overwintering in your garden. Fall-planted onions can start to grow while the ground is still warm, spend the winter in the garden, and then start growing again in spring. For the best results, buy onions that are known for overwintering in our area, plant autumn planting onion sets or look for multiplier onions. Add winter protection, like a low tunnel or thick layer of mulch.

Save Energy And Money With Plants

By | Blog Post | No Comments

It’s been a hot summer and the heat’s still on. Everyone I know is trying to find ways to stay cool, but running the AC all day means higher energy costs. One solution is to plant more trees, shrubs and vines to help with cooling.

Planting for beauty is one thing, but the shade that trees produce is more valuable than you think. Some experts estimate by strategically planting just three shade trees, you can save up to $250 a year in energy costs.

In addition to planting shade trees, there are other ways plants can help reduce energy costs. Here are some ideas for putting plants to work for you:

Plant shade trees on the south side of the house to provide the most shade in summer and warmth from the sun in winter.
Use dense evergreens, planted on the north and northwest sides of the house or other structures as windbreaks to also help reduce cooling costs.
Landscape so trees, vines and shrubs shade driveways, courtyards, and large windows.
Allow at least one foot between the house and the plants to add an extra layer of insulation.
Plant climbing vines on trellises for shade and to reduce reflected sunlight from buildings, walls and fences.
Add an arbor near the patio for a climbing rose that will offer shade and attract beneficial insects.
Plant drought-tolerant groundcovers as a living mulch or use them to reduce the amount of turfgrass to water.
Keep the lawn healthy by irrigating deeply, but less frequently. Follow the watering rules for your community and water the lawn only when allowed.
Test to see if the lawn needs watering by walking across the grass first. If the grass springs back when you lift your foot, it doesn’t need water.
Top dress the lawn with a thin layer of compost to encourage healthy roots by feeding beneficial microorganisms and slowing water runoff.
Layer mulch around trees and plants to help maintain soil moisture and slow evaporation.
Use a mulching mower and leave grass clippings on the lawn to add nutrients back into the soil.